As a backend developer, I do a lot of my work in a terminal (although, admittedly, not as much as I used to). That is why I had no doubt about trying out Ghostty, a new terminal emulator, as soon as it was released a few months ago, late last year.
Ghostty provides a number of prominent features like GPU acceleration that helps make scrolling and rendering feel smooth, and being super fast (although I’d probably only notice them if they were missing), along with others. However, as a regular but not intensive terminal user, there are three particular features that make it my go-to terminal without hesitation.
Make the Text Bigger, Not the Window
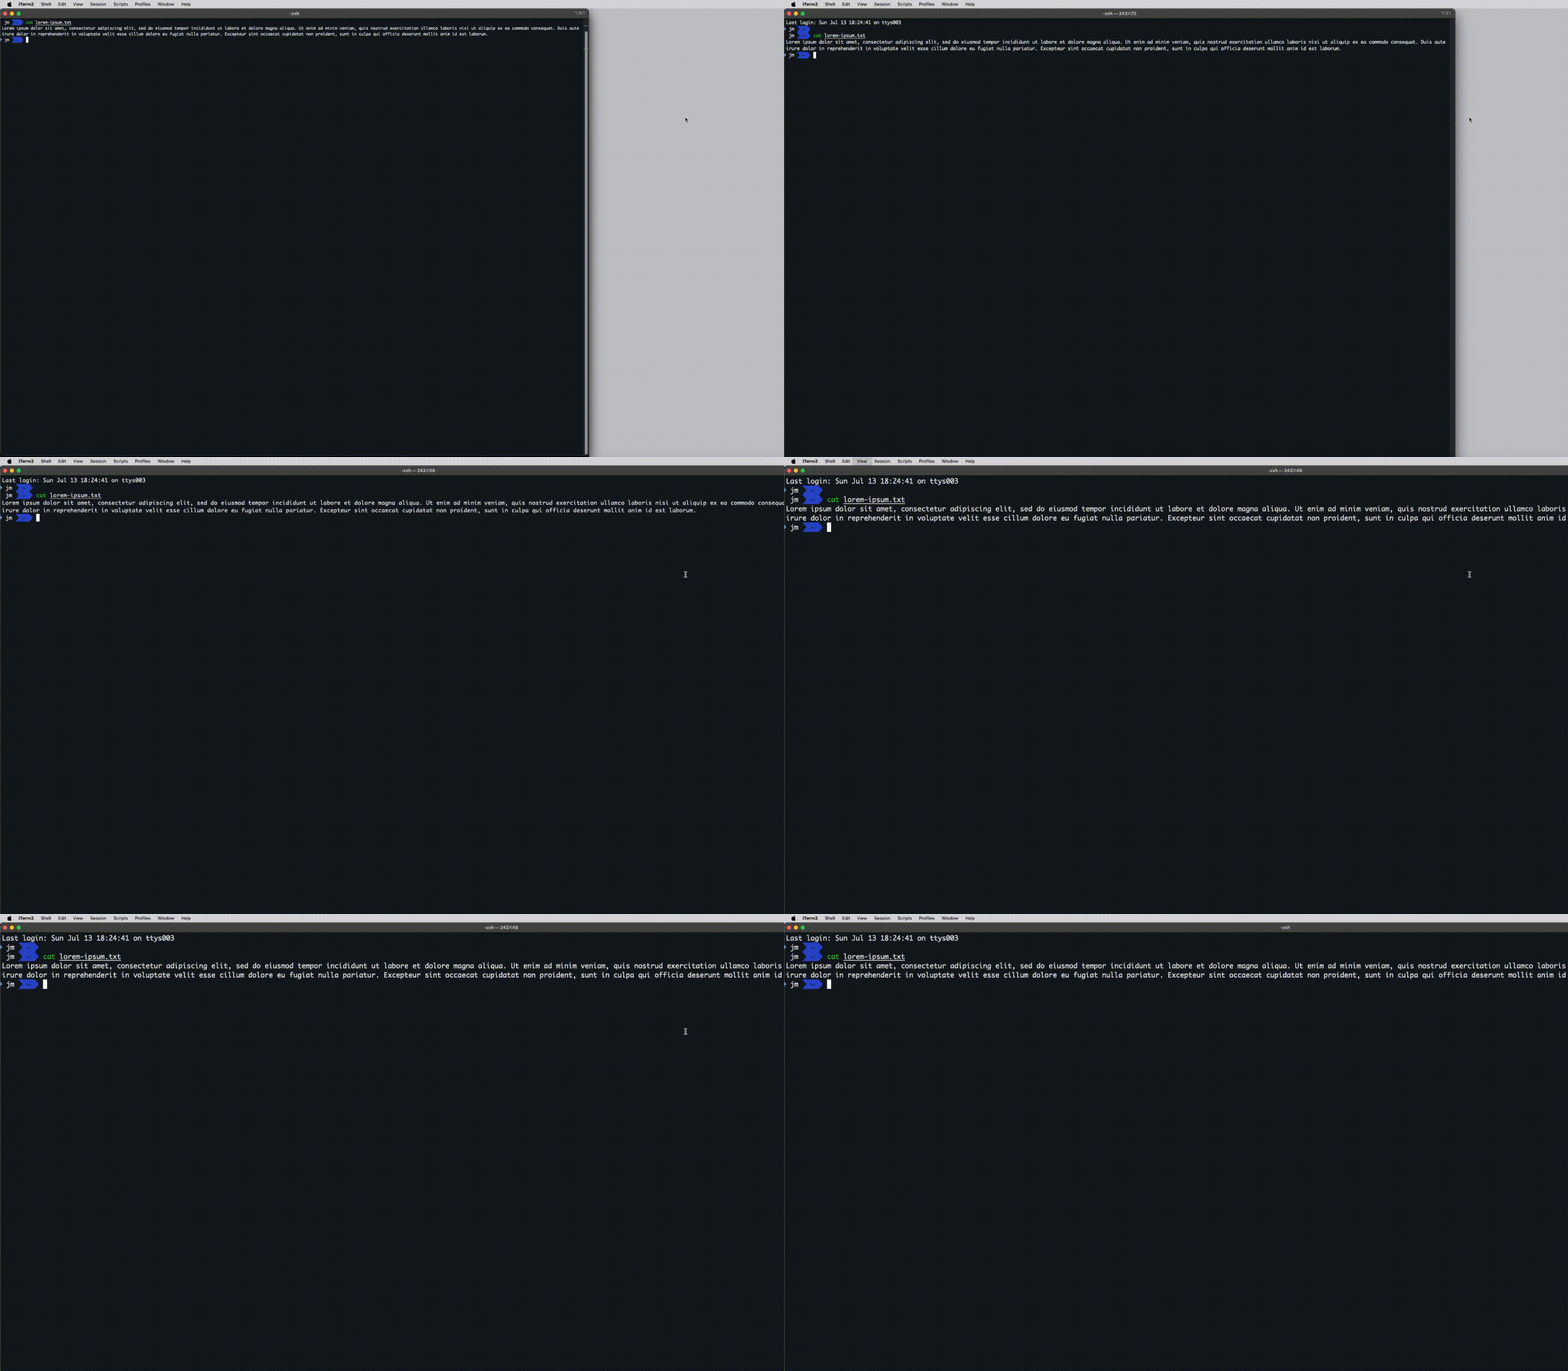
When I do live or recorded demos, or just share my screen, I usually increase the font size to make it easier on the audience to see the content I am sharing. If you’re like me, you may have noticed that whenever we change the font size in Terminal or iTerm, the terminal window size is also changed, as Image 1 shows.

Image 1: iTerm2 window is resized when increasing font size
I find this to be particularly annoying since I usually share only a part of my screen, and if the terminal window gets resized, I will likely share more or less than I intended to.
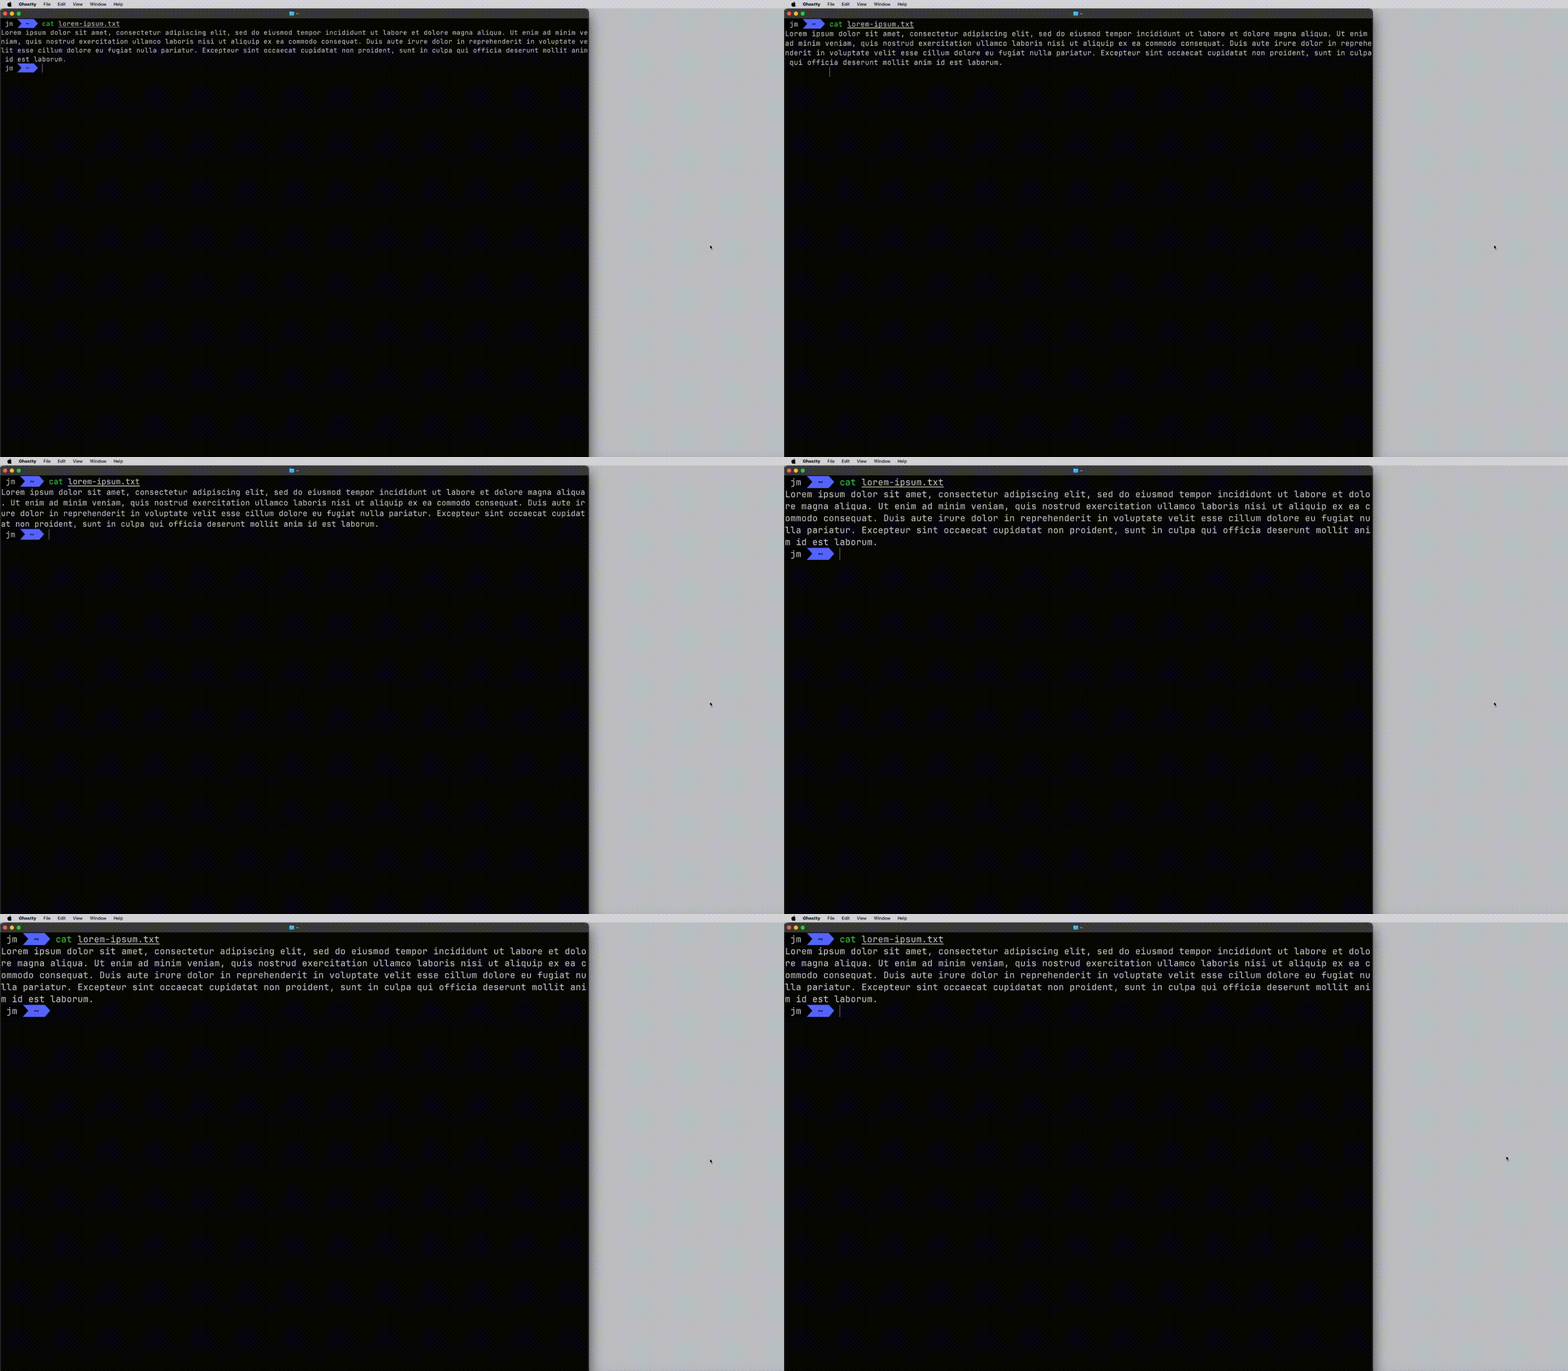
This is no longer a problem with Ghostty, as shown in Image 2. Whenever I increase or decrease the font size, the window remains the same size. I am actually zooming in or out as intended. For me, it’s just great to have a terminal emulator window that behaves as I would expect.

Image 2: Ghostty window is NOT resized when increasing font size
The above is possible thanks to the fact that “Ghostty is a native application for macOS and Linux.”. You can read more about that in the official Ghostty documentation: https://ghostty.org/docs/about#native
Easy Configuration
Although Ghostty comes ready to use out of the box, you may want to personalise it to get the best out of it.
Luckily, configuring Ghostty is extremely simple. All settings are stored in a file you can access by going to Ghostty > Settings, or Cmd + ,. There are several settings to choose from: you can see the full list in the official documentation: https://ghostty.org/docs/config/reference
In case you are interested, these are the setting I have defined based on how I use the terminal:
theme = deep
copy-on-select = true
keybind = ctrl+s>\=new_split:right
keybind = ctrl+s>-=new_split:down
keybind = ctrl+s>z=toggle_split_zoom
keybind = ctrl+s>r=reload_config
keybind = global:cmd+home=toggle_quick_terminal

keybind = ctrl+s>right=goto_split:right
keybind = ctrl+s>left=goto_split:left
keybind = ctrl+s>down=goto_split:bottom
keybind = ctrl+s>up=goto_split:top

keybind = ctrl+s>page_up=goto_split:previous
keybind = ctrl+s>page_down=goto_split:next

keybind = ctrl+5>right=resize_split:right,500
keybind = ctrl+4>right=resize_split:right,400
keybind = ctrl+3>right=resize_split:right,300
keybind = ctrl+2>right=resize_split:right,200
keybind = ctrl+1>right=resize_split:right,100

keybind = ctrl+5>left=resize_split:left,500
keybind = ctrl+4>left=resize_split:left,400
keybind = ctrl+3>left=resize_split:left,300
keybind = ctrl+2>left=resize_split:left,200
keybind = ctrl+1>left=resize_split:left,100

keybind = ctrl+5>up=resize_split:up,500
keybind = ctrl+4>up=resize_split:up,400
keybind = ctrl+3>up=resize_split:up,300
keybind = ctrl+2>up=resize_split:up,200
keybind = ctrl+1>up=resize_split:up,100

keybind = ctrl+5>down=resize_split:down,500
keybind = ctrl+4>down=resize_split:down,400
keybind = ctrl+3>down=resize_split:down,300
keybind = ctrl+2>down=resize_split:down,200
keybind = ctrl+1>down=resize_split:down,100
As you may have noticed, most of them are key bindings to create, resize and navigate split screens. This may give you a hint about what my next favourite feature is: built-In Tmux Features.
Built-In Tmux Features
In my early days, I was an intensive user of Screen to split my terminal in different working spaces, until a friend convinced me to try Tmux, which I had been using ever since.
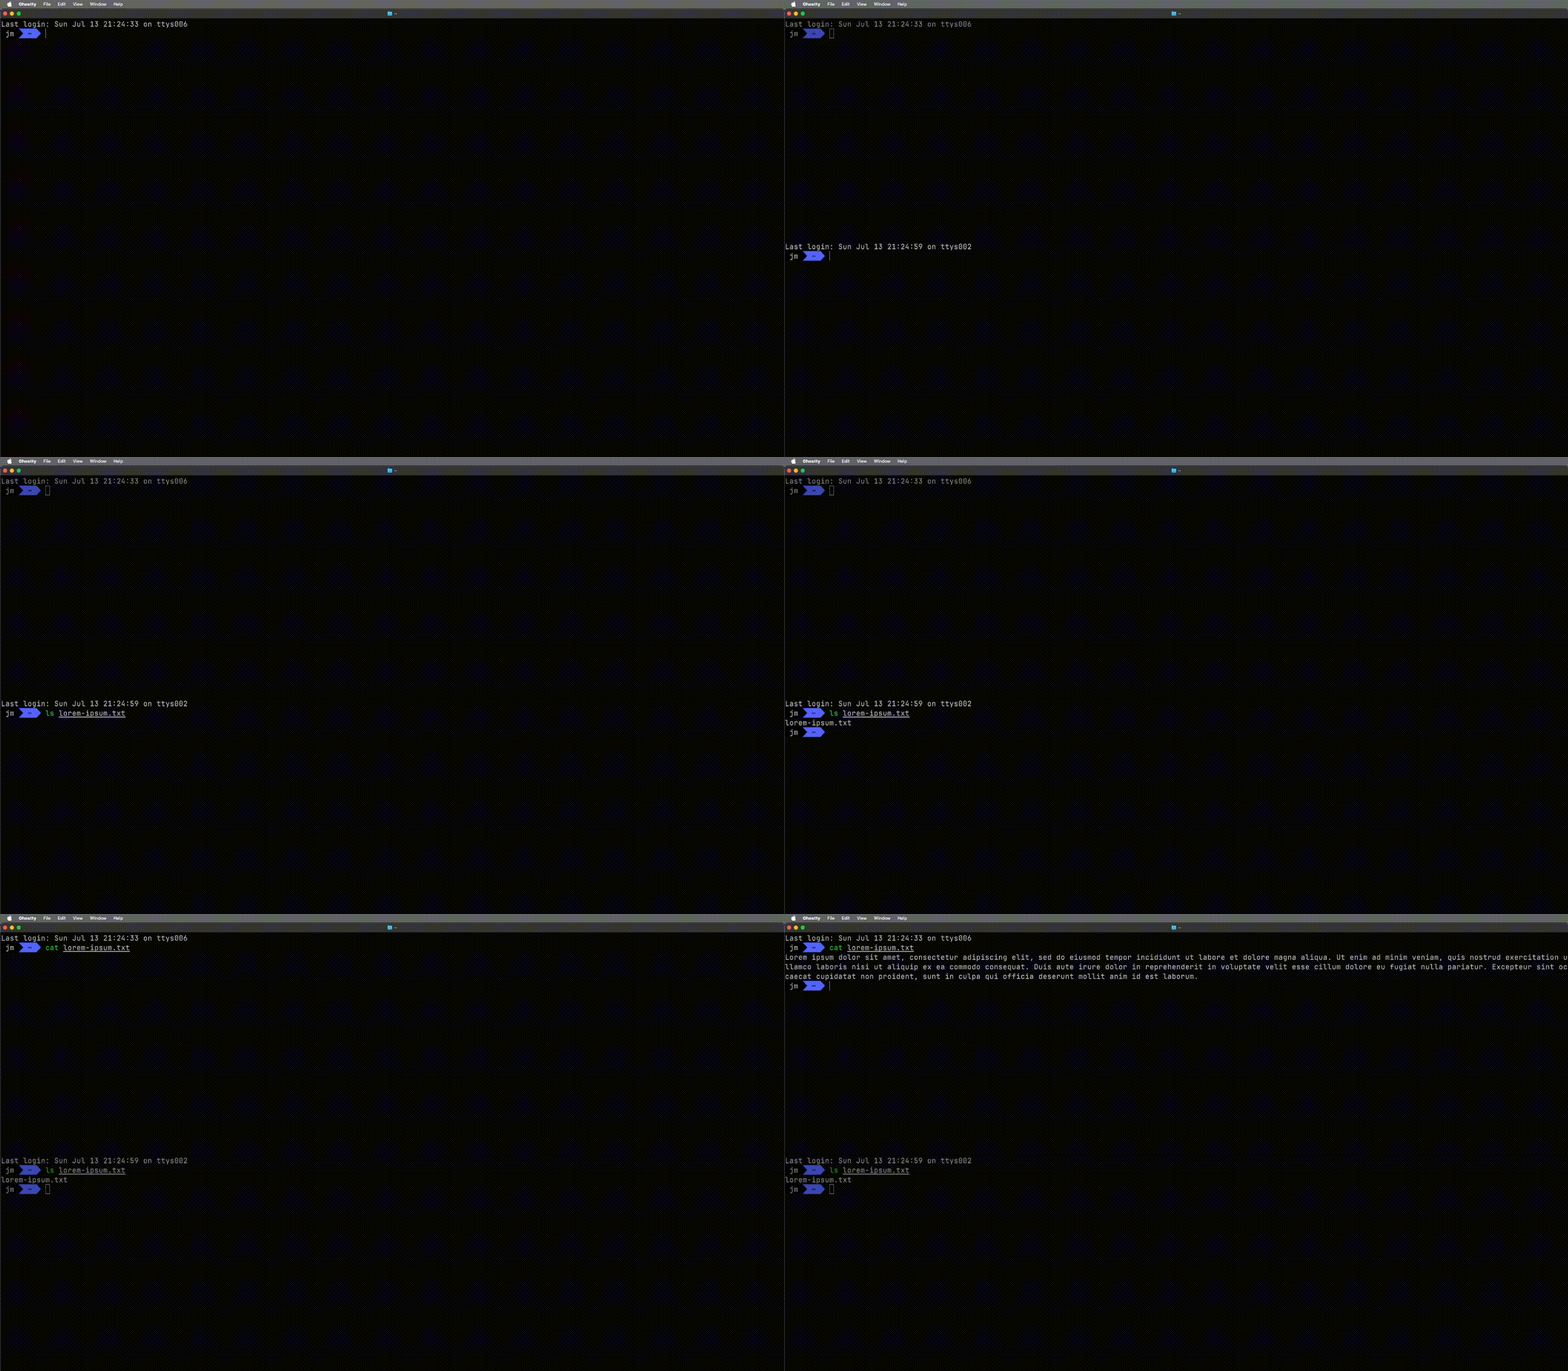
For this reason, I was very pleased when I found out that Ghostty natively supports splitting screens horizontally and vertically, as shown in Image 3. While iTerm2 also supports splits and works reliably, it does not look as clean or natural as it does in Tmux, and now in Ghostty. In Ghostty, the experience is so seamless that I can barely tell I am not using Tmux.

Image 3: Ghostty built-in split feature
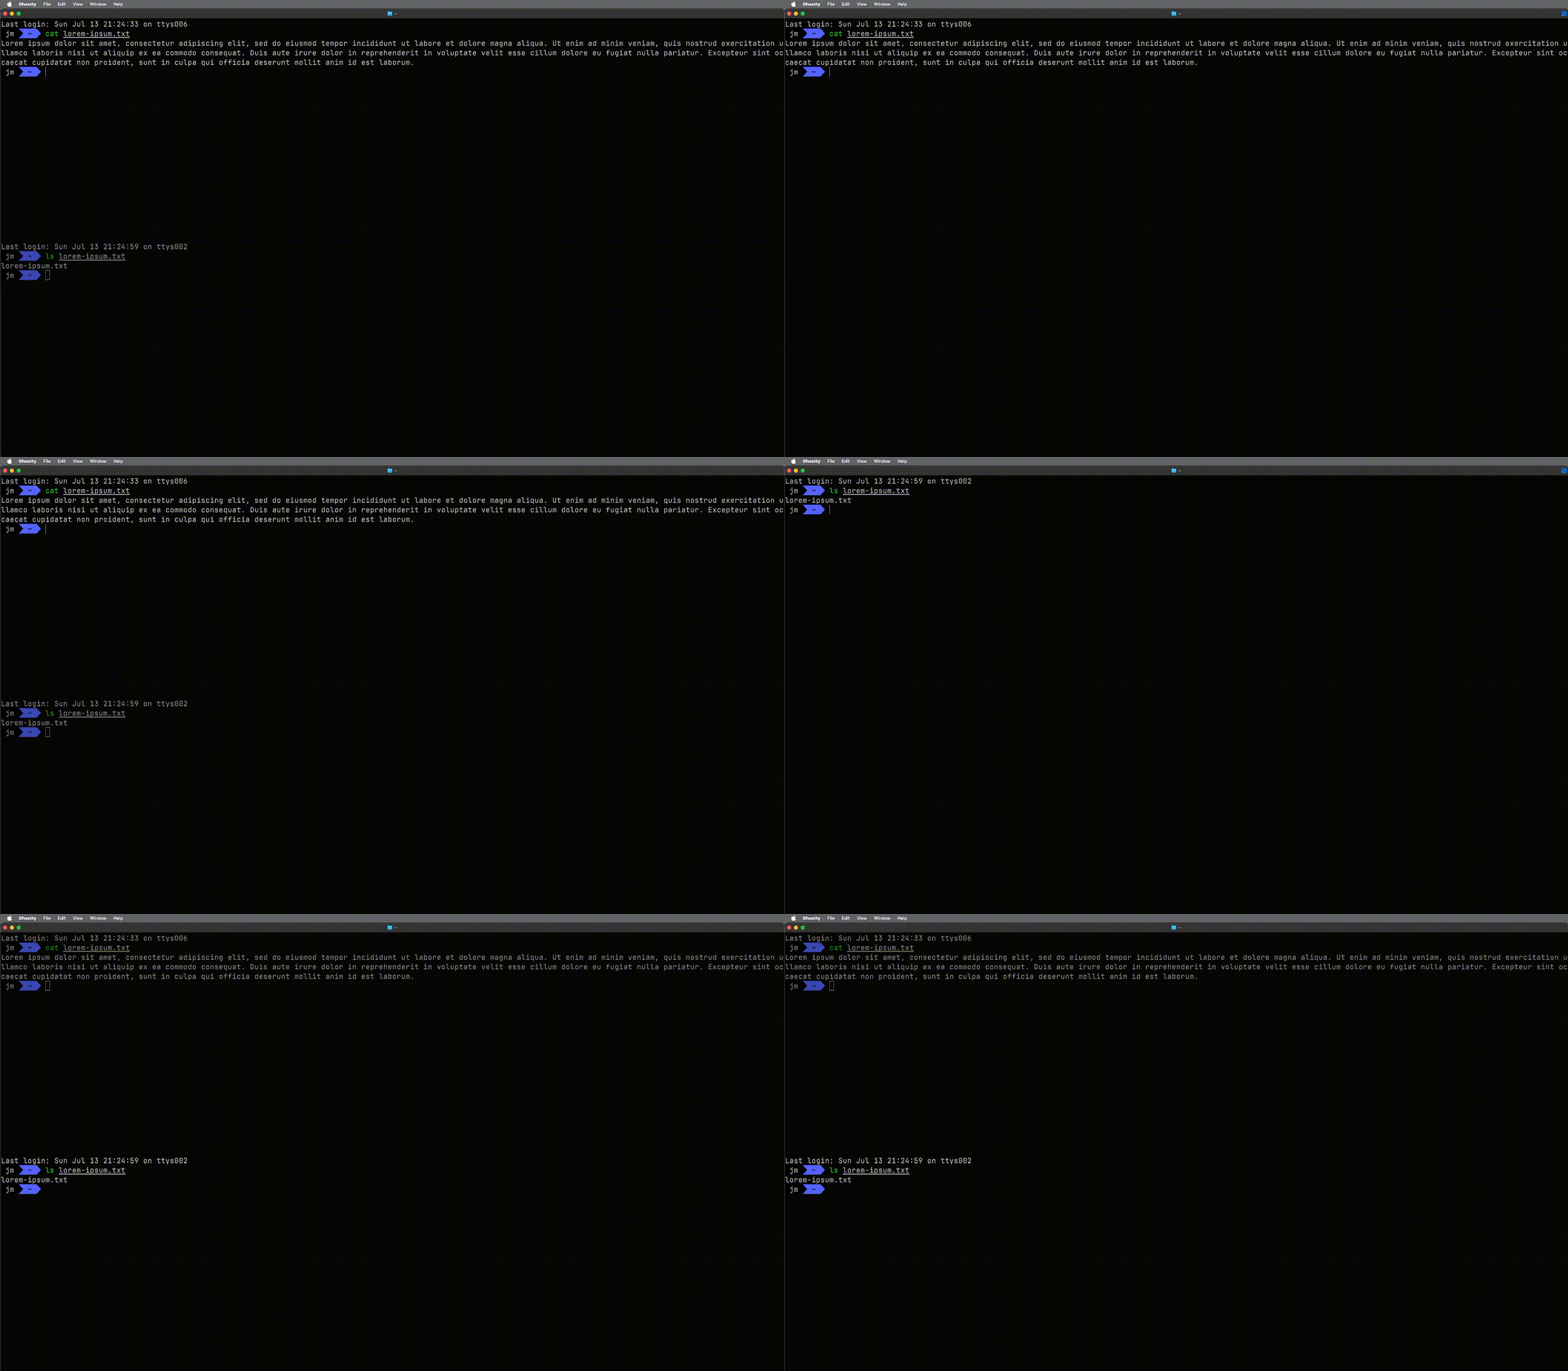
On top of that, Ghostty also supports the Tmux‑style zoom feature, which lets you maximise a single split, temporarily hiding other splits. The example on Image 4 shows how we can focus on each of two horizontal splits:

Image 4: Ghostty supports zoom in individual splits
It’s worth noting that the zoom feature is also available in iTerm2, but as you may have noticed, I really prefer how this is implemented in Ghostty, mainly because I feel it looks way better than in iTerm2 (maybe due to the GPU acceleration?).
In practice, these features mean that there is one less tool I need to configure to set up my workspace. If you use Tmux features like session management you may want to stick with Tmux though, but the built-in features that Ghostty provides are good enough for me, and work great for my use cases.
If this sounds interesting, you may want to learn more on the official documentation: https://ghostty.org/docs/about#feature-rich
Wrap up
I like to try new technologies when they become available, and Ghostty has helped me improve my development workflow. I like using Ghostty because it helps me be more efficient at coding. If you feel this may help you, I would encourage you to give it a go.
However, that doesn’t mean this is for everyone. Maybe you do like your window to be resized (or it’s not a big deal for you), or maybe you need all Tmux’s features.
Changing tools may be disruptive, especially at the beginning, so if you decide to try this or another new tool out, make sure you’ll have enough time to set it up properly. Ghostty does not need to be configured to use it, but I did spend some time looking for the settings that made it comfortable for me.
Please note that this is not a comprehensive review of terminal emulators. I’ve only tried this on macOS, and only Terminal, iTerm2 and Ghostty. If you have a different experience, or some other recommendation, please share!
Cheers!
José Miguel
Share if you find this content useful.
Follow me on LinkedIn to be notified of new articles.

